For an informative ten-minute read about coils, visit this highlighted sentence…
In the beginning & before we start…
You must optimise the Swing of your metal detector to Maximise the surface coverage & depth, & this is so important for new detectorists like Mark to understand and practice…
Many people lose depth by the incorrect way they use the detector, but more importantly, how they swing the detector…
To maintain as much ground cover you need to keep the coil close to the ground by using a smooth side-to-side motion that covers a semi-circular area in front of you, keeping the coil of your metal detector as close to the ground as possible, ideally, it would be about an inch or less above the surface, or as close as the vegetation / ground allows you to without bashing the coil too much, whilst maintaining a steady arc as you sweep slowly from left to right and vice versa, making sure you cover the ground with a swing and pace that suits you to reduce fatigue that is caused by the incorrect swing, also using the coil wrong you lose ground cover and as shown here your hardly detecting the ground as you go forward…

This shows the wrong Swing Technique when out in the field…
To make any outing with a metal detector successful many factors play their own individual part, one of the most important things to master is the art of keeping your coil parallel to the ground, an important technique many have not conquered, when out on a rally just stand back and observe, it does not matter if you have an expensive metal detector or a cheap beginners metal detector, it is only as good as the operator, it’s not how capable your metal detector is if you’re only just detecting the ground at the bottom of your swing…
By not doing a correct swing you are wasting your time, energy, & effort, this is the often overlooked yet critical piece of detecting & that is how you master the technique you use when swinging your metal detector… an interesting side note, if you practice turning the edge of your coil DOWNWARDS at the end of every sweep this helps in maintaining a near perfect parallel swing to the ground…
Practice makes Perfect…
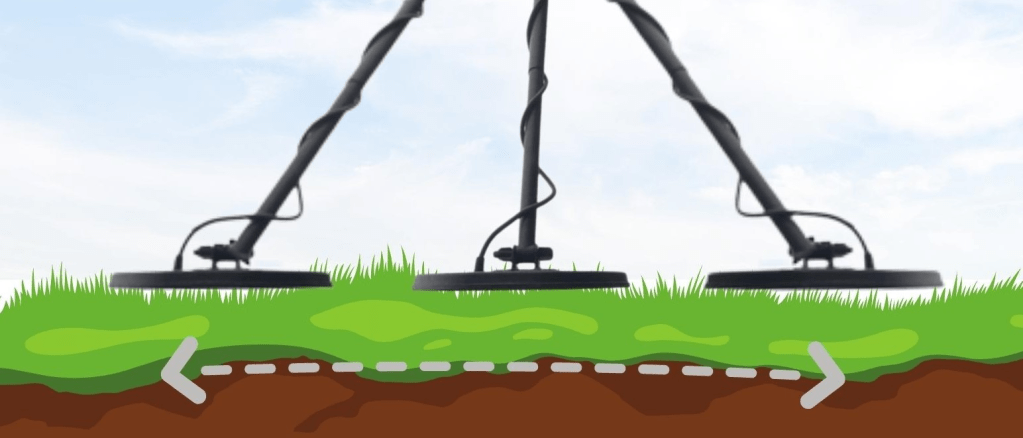
If you are not using the proper swing technique, you are affecting the depth capabilities of your metal detector, which in turn affects the depth at which your metal detector can get a signal from coins & artefacts. Also, the area you cover is about 20% of each swing; you can easily lose 80% effectiveness by a lazy or incorrect swing, by scraping the ground, you’re not detecting air, but the actual surface of the ground, allowing more depth to be gained, if your worried about any damage caused by the stones and rocks, your scuff cover protects the actual coil from 99.99% of damage caused by the stones & hard ground, if your still raising the coil on every swing try dipping your coil back to the ground at the end of every left or right swing, that works very well, because you have think about your swing…
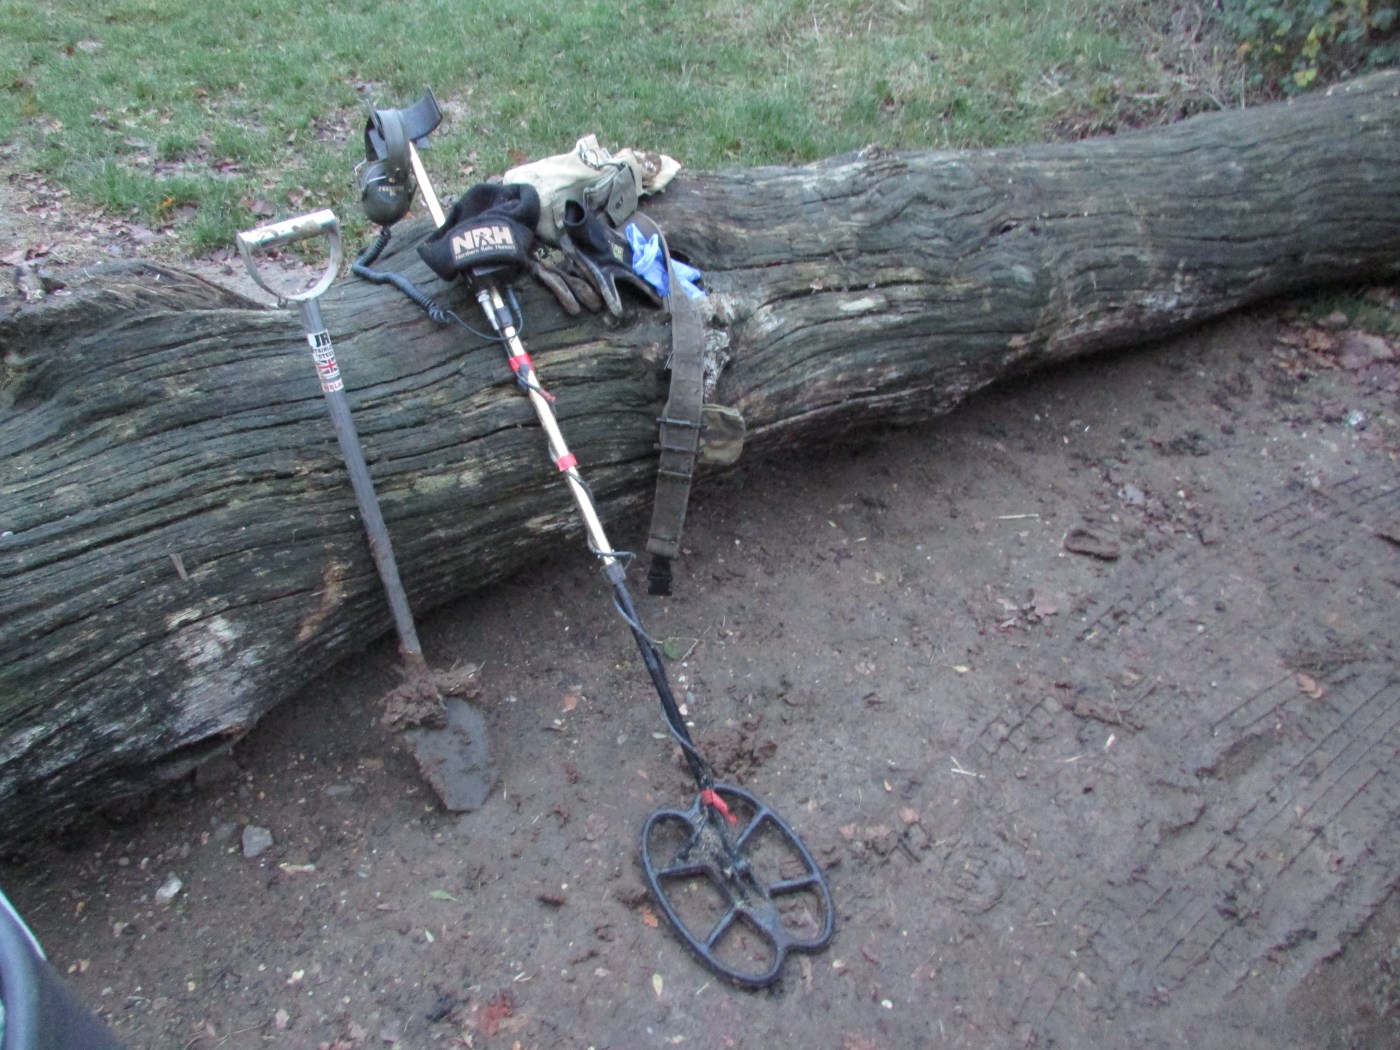
This was posted in another group, on Facebook, and I thought it would be a shame not to share here…
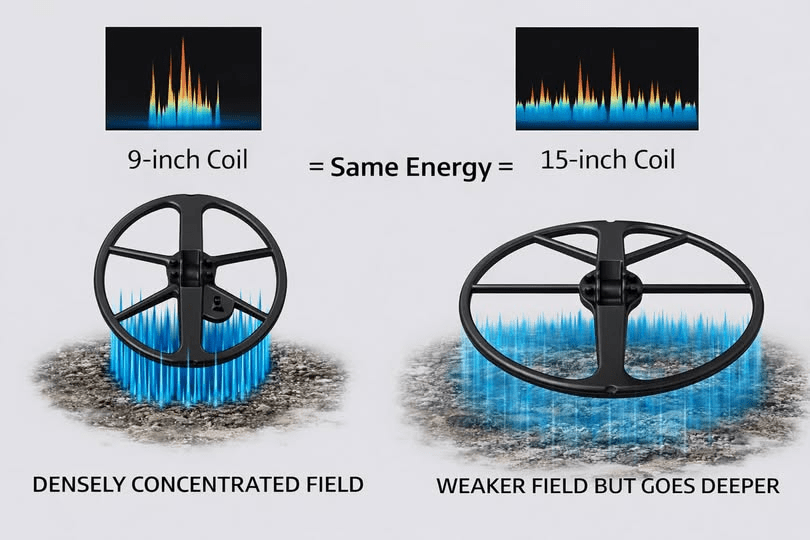
A larger coil projects a broader, less concentrated EM field. That’s why it couples well with large masses at depth, but it will never interrogate a small or awkward target with the same intensity as a smaller coil. Especially the 9-inch — its diameter vs power hits the sweet spot. All those who use it know that.
Most of our land is quite tough going. Well, it is here in the SW UK.
A coin on edge presents a tiny cross-section. A smaller coil with higher flux density can still couple; a big coil spreads the same transmit energy wider, so the return signal is diluted.
In a field with iron, a smaller coil isolates the coin from the nail. The big coil sees both together, averages them, and the coin response vanishes.
Resolution doesn’t just mean “separating two targets.” It means resolving the fine detail of a single weak target’s response from the ground matrix. Bigger coil = poorer resolution, always.
And about “perfect soil” — sure, on a clean patch or clean test garden, the loss is less obvious. But that’s not detecting reality. In 99% of the ground we hunt, mineralisation + stubble + random ferrous means resolution is king.
The idea that a 15” can “see small just as well” is probably not the best advice, as it’s so rarely a field truth.
So yes — a 15” coil gives depth on large deep conductors. But on single hammered coins, cut quarters, or a Roman bronze lying awkwardly, it will always be less efficient than a smaller loop. No amount of “perfect conditions” can change the underlying physics.
More ground coverage? Per swing yes, but overall – probably not. Well, not unless you have arms like Arnie in 1986. The double sweeping stops, those little cheeky after checks stop – because it’s all effort. And chances are, a much shorter session.
I agree, it’s an important piece of the arsenal, but in my experience, it only comes out for hoard hunting in good soil
A question posted on the page (1) DETECTING IN DEPTH – Technical Forum | this Facebook page talks about how the coils actually work, with a good, graphic explanation…
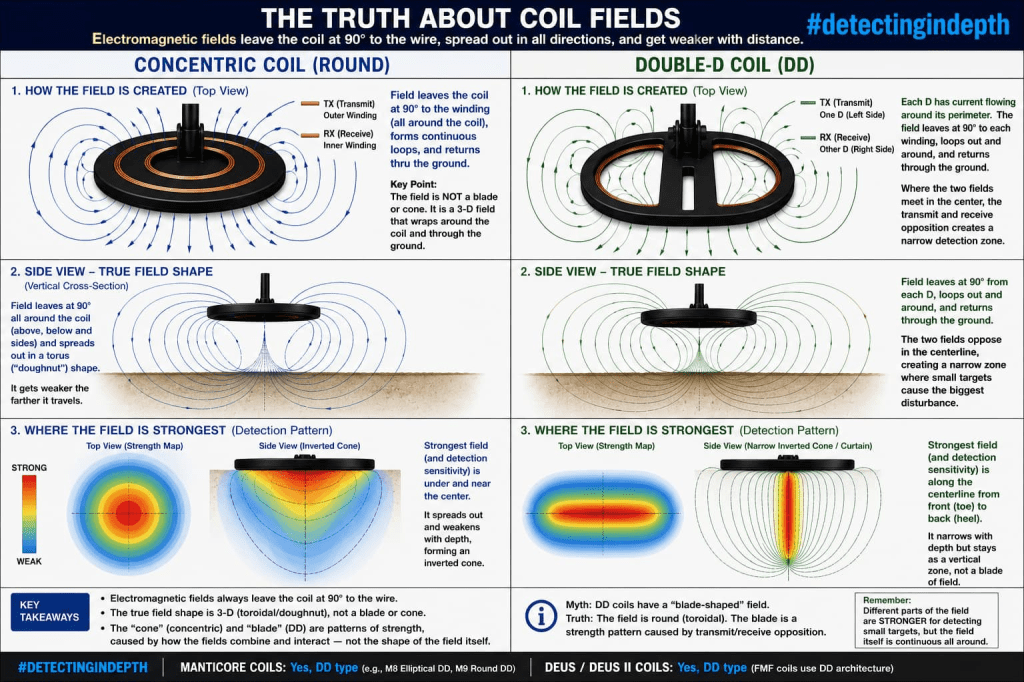
Not sure I understand fully. With a DD coil, I infer from the explanation that the EM field is two doughnuts whose fields intensify in the centre of the coil. But in the graphic, it states one coil is transmitting, and the other receives. What am I missing?
Think of the DD centre line not as two doughnuts joining to make a stronger field, but as the zone where the transmitted field and the receive coil are best positioned to detect a target disturbance. Arguably, a receive coil would not have the same ‘doughnut’ as it’s listening and not emitting (so much less strong), but you can argue that the receive field pattern will be broadly similar, hence it makes sense to show it diagrammatically …
So, how true is the older but widely used graphics ? If we compare the new with the old, the only difference is modern AI making things look more technologically sound and proving the point…

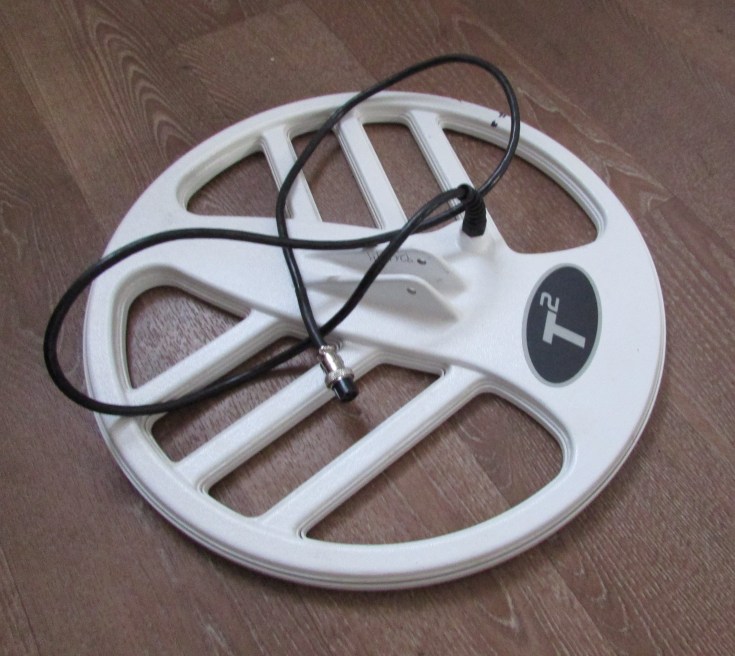
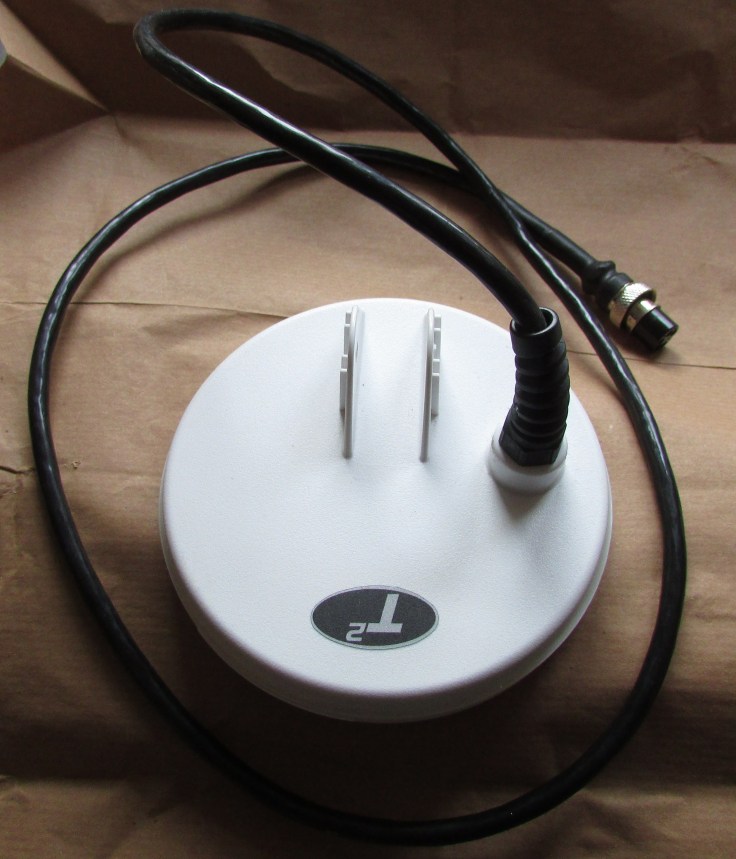
Most coils for various detectors work the same, although they will not be interchangeable between brands, the products listed below are the coils i am using on my T2se or other metal detectors in my possession, but please bear in mind, the T2 only operates with DD Coils and not concentric or multi-frequency coil, as a guide for achieving better results out in the field, it is best to choose your metal detector with a ground balance feature……
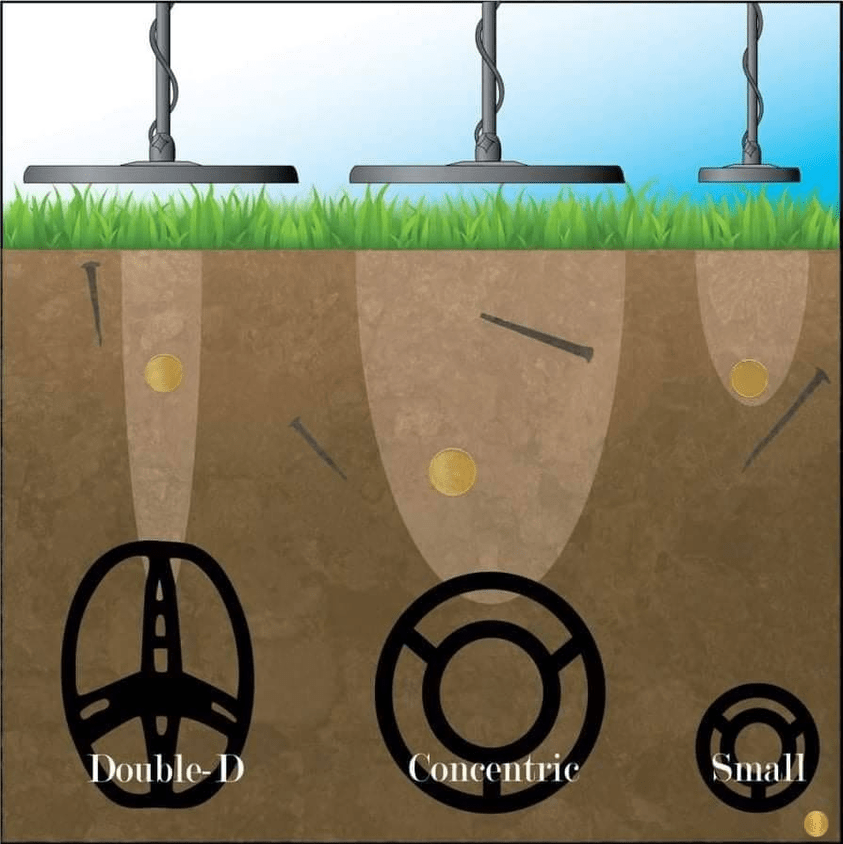
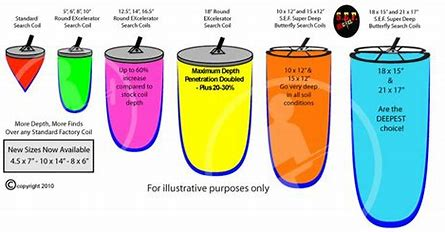
“Shown below is a good coil comparison diagram”
Shown below is the difference between the size, and how it affects the frequencies of the different coils, and how much it affects the depth & width of the search pattern, bearing in mind the size of the coils, but if you assume the two larger ones are 8″ with a 5″ coil on the far right…
Although the DD coil doesn’t reach quite as deep as the concentric coil, the difference is minimal. The concentric coil struggles on various mineralised soils, since you’re rarely operating in ideal ground conditions.
In contrast, the DD coil stays more stable and produces less noise without sacrificing noticeable depth when the sensitivity is set high, whereas with a concentric coil you’d need to lower the sensitivity. As shown in the diagram, the nail isn’t in the intended target area of a DD coil but is within that of a concentric coil, meaning the DD coil experiences less interference in contaminated soil and can be highly effective. The slightly more sensitive concentric coil, however, is great for clean ground or parks where aluminium cans and other unwanted signals fall into the same range as targets.
Does size matter, with coils…
In my opinion, “yes,” it does…
Here’s why my opinion is “Yes”… The size of any metal detector coil influences the detection depth and sensitivity of the metal detector itself because a metal detector coil works by emitting electromagnetic waves...
The smaller the coil, the fewer electromagnetic waves are created… When these fields of electromagnetic waves come into contact with a metal object, this metal object then produces its own eddy current within the metal object, which then generates its own electromagnetic waves, it is these waves from the metal objects that are registered by the metal detector…
Although a small coil is not as deep as a large coil, it does have a more concentrated electromagnetic field, making it more sensitive to small objects & tiny fragments, making these metal objects more easily detected…
When you choose to use a smaller coil, you gain a lightweight and “easily” maneuverable coil, as these smaller coils can fit in small or tight places, & very easily fit in between the rows of stubble that gets left behind when the crop has been harvested… For many, depth is everything, but although depth will not change too much, the size & shape of small coils are changing, & like the one i have my eyes on at the moment, which is a ten by five, these narrow coils i hope will allow me to cover more ground, yet have the benefit of a smaller coil …
Shown on the left is the Nel coil for the T2, which was never my favourite. No matter how much effort I put in, manual ground balancing was tricky, and pinpointing was just as challenging. While those were only two of the issues, I never really trusted the coil—it never felt sharp, and I always had the sense I was missing items.
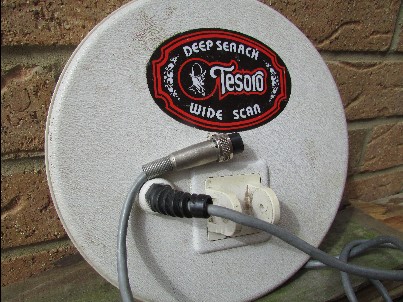
Shown below right is the standard 8″ DD coil for the five-pin Tesoro range of metal detectors, not large by today’s standard 11″ plus DD coils, but this coil can still hold its own…
If you remember that most coils should be purchased for a specific task, you will not go wrong…

Frequency & Understanding the Coils
What Is the Operating Frequency for Metal Detecting-?
Understanding the frequencies of a metal detector helps with your search in everyday exploration…
Whether you are new to metal detecting or not this brief synopsis goes some way to explain how these frequencies work, & what the operating frequency actually is, and how it affects the metal detector you are using, so first let’s have a look at the operating frequency & what it has to do with locating buried metal …
Understanding the difference between low-frequency, high-frequency, multi-frequency, and pulse induction metal detectors can seem confusing, but it soon becomes quite clear when you start to understand a few basic rules, simply stated, you can improve your searches when you use different operating frequencies, or like most manufacturers of metal detectors they stick to a single frequency for the optimum search, this article will help you understand how operating frequency signals work in greater depth. Understanding frequencies will help you in your search for buried objects like coins, artefacts, jewelry, gold etc…
Frequency is the number of waves per unit of time measured in kilohertz or this is abbreviated to kHz…
Now, this is the number of electronic waves passed through a metal detector’s coil directly into the ground, for example, if your metal detector operates at a 14kHz frequency, this is when it transmits and receives 14,000 times every second, so to get less technical if your detector repeats itself 12 times a second it operates on a 12kHz frequency…
The frequency that a standard Metal Detector operates on best for use in fields, parks & dry sand is between 5kHz to 17kHz frequency, this is the optimum range for coins jewelry, & artefacts, many successful metal detector manufacturers tune their machines within this range…
Most metal detector models that are purchased operate on a single preset kHz, which varies between manufacturers, whilst some manufacturers offer a machine that has a process that allows a small amount of kHz shifts to eliminate chatter between different detectors, when they are in close proximity of each other, more and more metal detectors are now offering different operating frequencies on the same machine, which allows the user to find a specific range of targets, this can lead to confusion if you’re not careful, as the machine might be advertised as a multi-frequency machine when in fact it only operates on one single frequency at any given time, but, the multi frequency comes in when you reprogram the interphase and alter your kHz… as an example, if your currently searching in 8kHz but your convinced that is not finding the objects you’re looking for, then you alter the machine to 15kHz, that’s how a metal detector with multi frequency operates, whilst Nokta & Minelab offers true full multi frequency at the same time, this is advertised as continuous multi frequency…
So we now know that most manufacturies sell their machines with a preset kHz, which ranges between 5kHz to 17kHz, but specialist metal detectors have a higher frequency if your looking for gold on a gold field or prospecting an area where you suspect gold to be, then your metal detector would benefit from using a much higher kHz ranging from 17kHz to 70kHz, depending on specialist knowledge…
When metal detecting with the wrong machine or a cheap Chinese detector, this is where your unlimited amount of iron comes into play, this all-important fact, has never changed, the lower the machine’s frequency the more easily your detector will locate iron and other low conductivity metals, but don’t forget that some relics and not least iron relics come into this category…
The higher the operating frequency, the more easily your detector will locate high-conductivity, metals like silver & gold…
Frequency and Conductiviti
All metal objects buried in the ground, conduct electricity, which allows the metal detector to locate a signal, in some way or another, with different types of metal detectors. A VLF style industrial metal detector or even a hobby metal detector device will tell you the type of metal it has found by how well its electronics conduct electricity and the frequency pulses it passes into the ground. These are determined by the speed that the signal sent back to the device decays over time. Modern metal detectors can discriminate between metals to identify typically on an LCD screen the type of metal it is. They can allow you to decipher the difference between ferrous and non-ferrous by using discrimination to stop the device from picking up on them. Pulse induction and beat frequency oscillator metal detectors make use of the specific frequency of electromagnetic fields or pulses passed through the ground to locate the buried target. There are different advantages and disadvantages of various frequencies used for metal detection.
Low Frequency…
Lower frequencies possess longer wavelengths. They also have greater depth as low frequencies have long waves that penetrate the ground more easily than high frequencies. Low frequency is the best way for high conductivity target detection. Items such as silver are easier to locate using lower frequencies. Two of the main disadvantages of using low frequencies is that they are not good at locating small targets. In addition, it is difficult for finding gold but best for finding iron.
High frequencie…
metal detectors work with shorter wavelengths than lower frequencies. These are excellent for locating small targets. Items such as small gold nuggets are ideal targets for high frequencies. Iron and ferrous metals are low conductivity targets and low frequencies are better at locating them than higher frequencies. The wavelengths achieve less depth when searching. You have a high accuracy in locating targets that are near the surface. Finally, high frequencies are more sensitive to ground mineralization which can cause interference when searching. For this reason, it is important to ground balance to filter out these minerals.
While wearing wireless headphones or high quality metal detecting headphones you will most easily hear the signals your device makes as you search for treasures. Soft or marginal signals produced by your device are typically difficult to hear with out headphones.
Metal Detector Frequency Chart
In each metal detector frequency chart diagram below, we have compared the frequency and frequency type by technology and by brand. We have broken each chart down by Locator type, frequency detection capability, sonde capability and sonde frequency.

